April 21, 2026
·5 min readAI PHOTOSHOOT WITH YOUR OWN ITEM
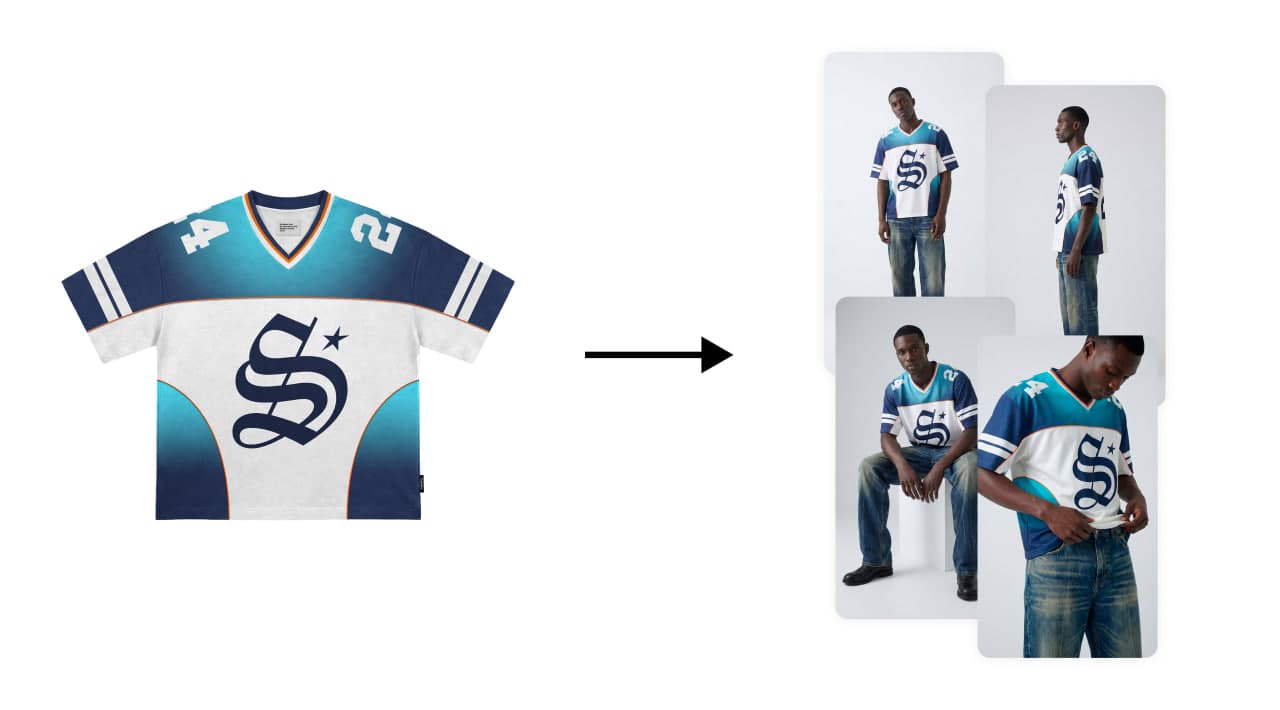
Workflow link at the end of the article!
How the system works
This is a Weavy workflow I built using Nano Banana Pro. One system. Eight poses. No photography skills required.
[ Base model ] → [ Add designs ] → [ Generate 8 poses ] → [ 4K images ]
Step 1: Creating the base model look
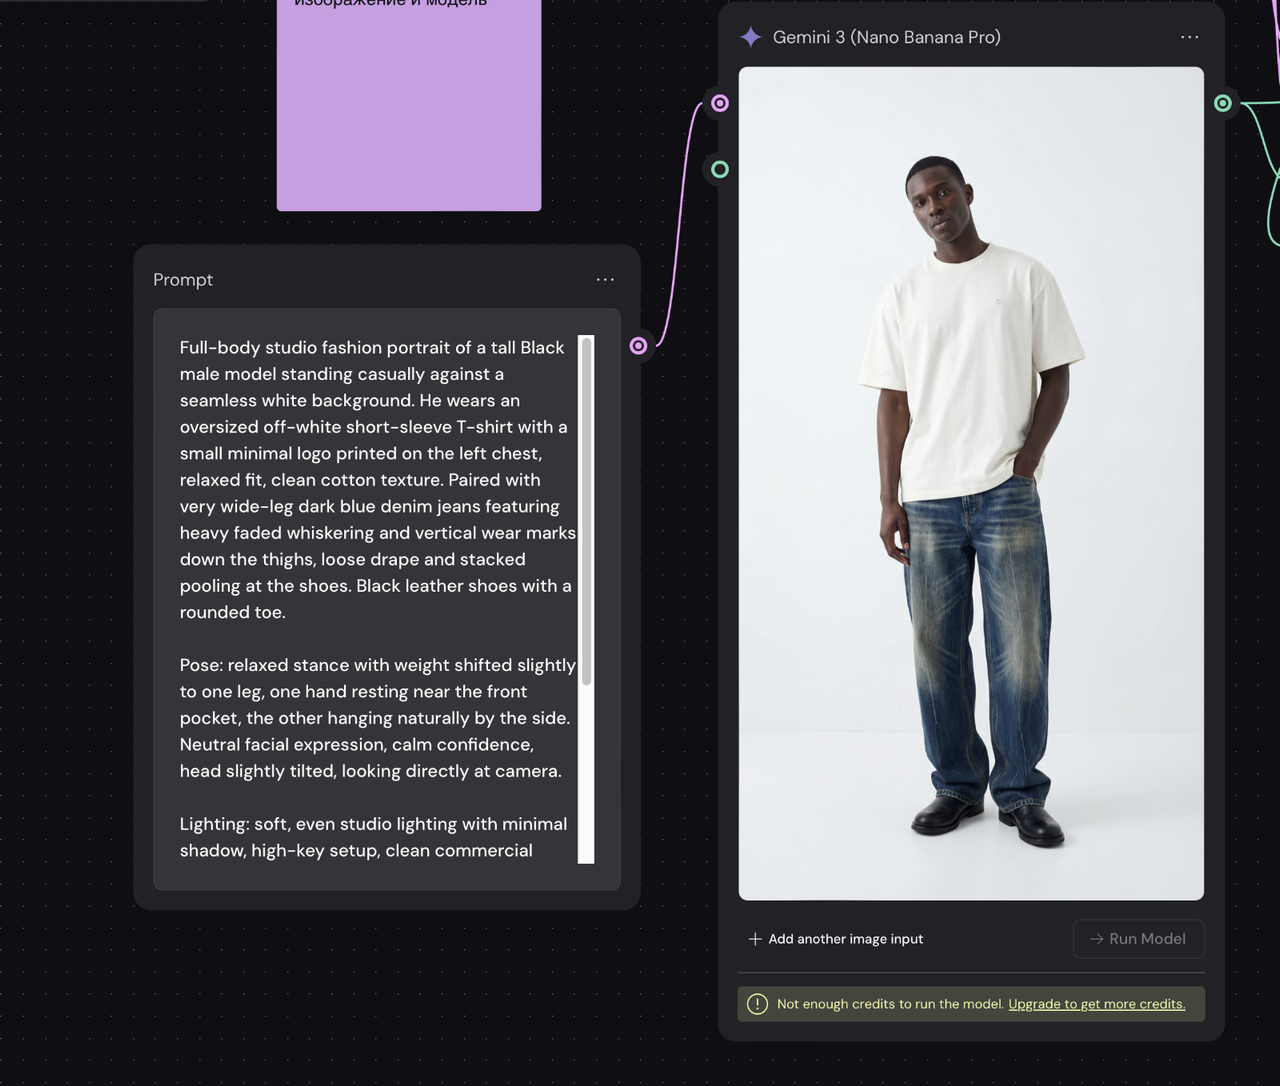
First, we need a base look — a model in simple clothing that we can then dress in our designs.
Generate it with Nano Banana Pro
Use the prompt below to create the base model. Nano Banana Pro is the best AI software for this type of image — clean, realistic, studio quality.
Base model prompt
Male model with short dark hair, dark skin, standing in a professional photography studio, clean white backdrop, soft studio lighting, neutral pose, wearing simple black t-shirt and dark jeans, full body shot, 4K resolution, commercial photography style, e-commerce ready.
💡 Pro tip: customize the model
Need a specific ethnicity, hairstyle, or look? Just change the prompt. You can also use ChatGPT — paste in the base prompt and say "Adapt this so the model matches [your requirements]."
Step 2: Add your designs
Once you have your base model, it's time to upload your designs into the workflow.
Uploading to "References + Shots"
In the Weavy workflow, drag your design images into the yellow "REFERENCES + SHOTS" section. This is the clothing that will be placed on your model.
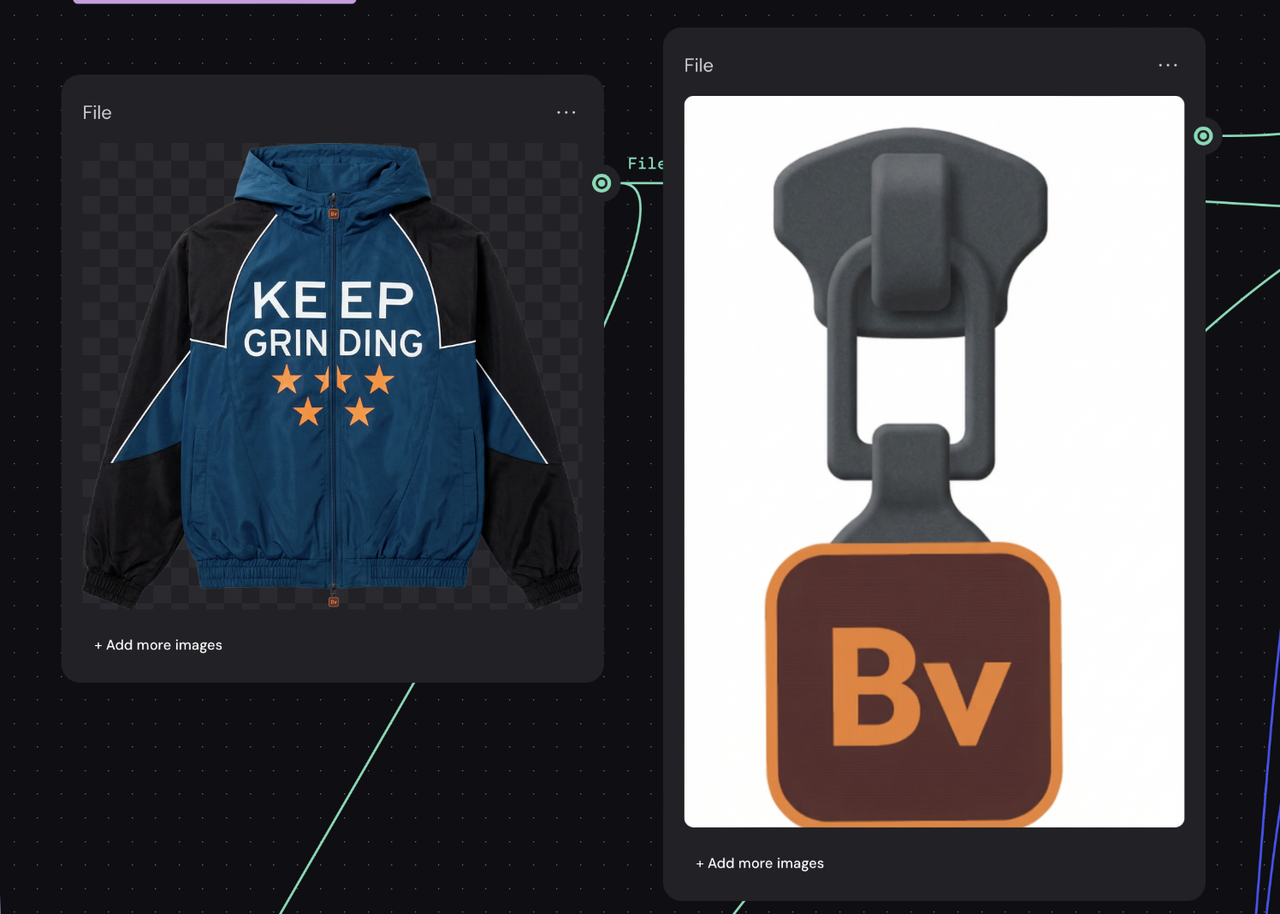
There are two ways to get a quality mockup:
Use a ready-made one — for example, I have a library of 150 mockups like this in 4K. You can add your own print, tags, details, and so on.
2. Create your own from scratch, like I did. If you have a complex garment, you won't find a ready-made mockup for it.
⚠️ For better accuracy
If you have details that don't reproduce well (like a zipper or a logo), attach both the mockup and a close-up of that detail. The system will use both reference images for better accuracy.
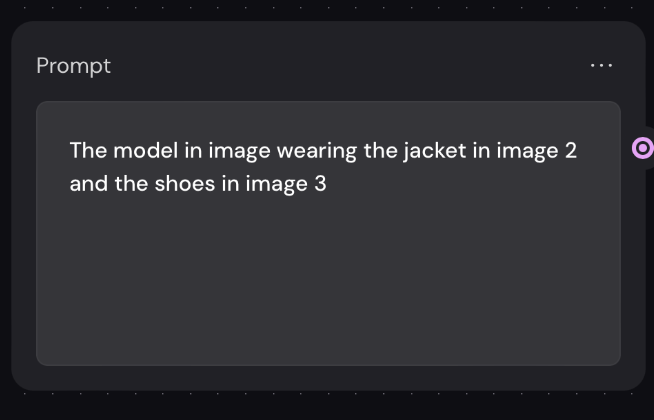
adjust the details here — if it's a t-shirt, write t-shirt. You can also upload specific items for the model — I'll cover that a bit later.
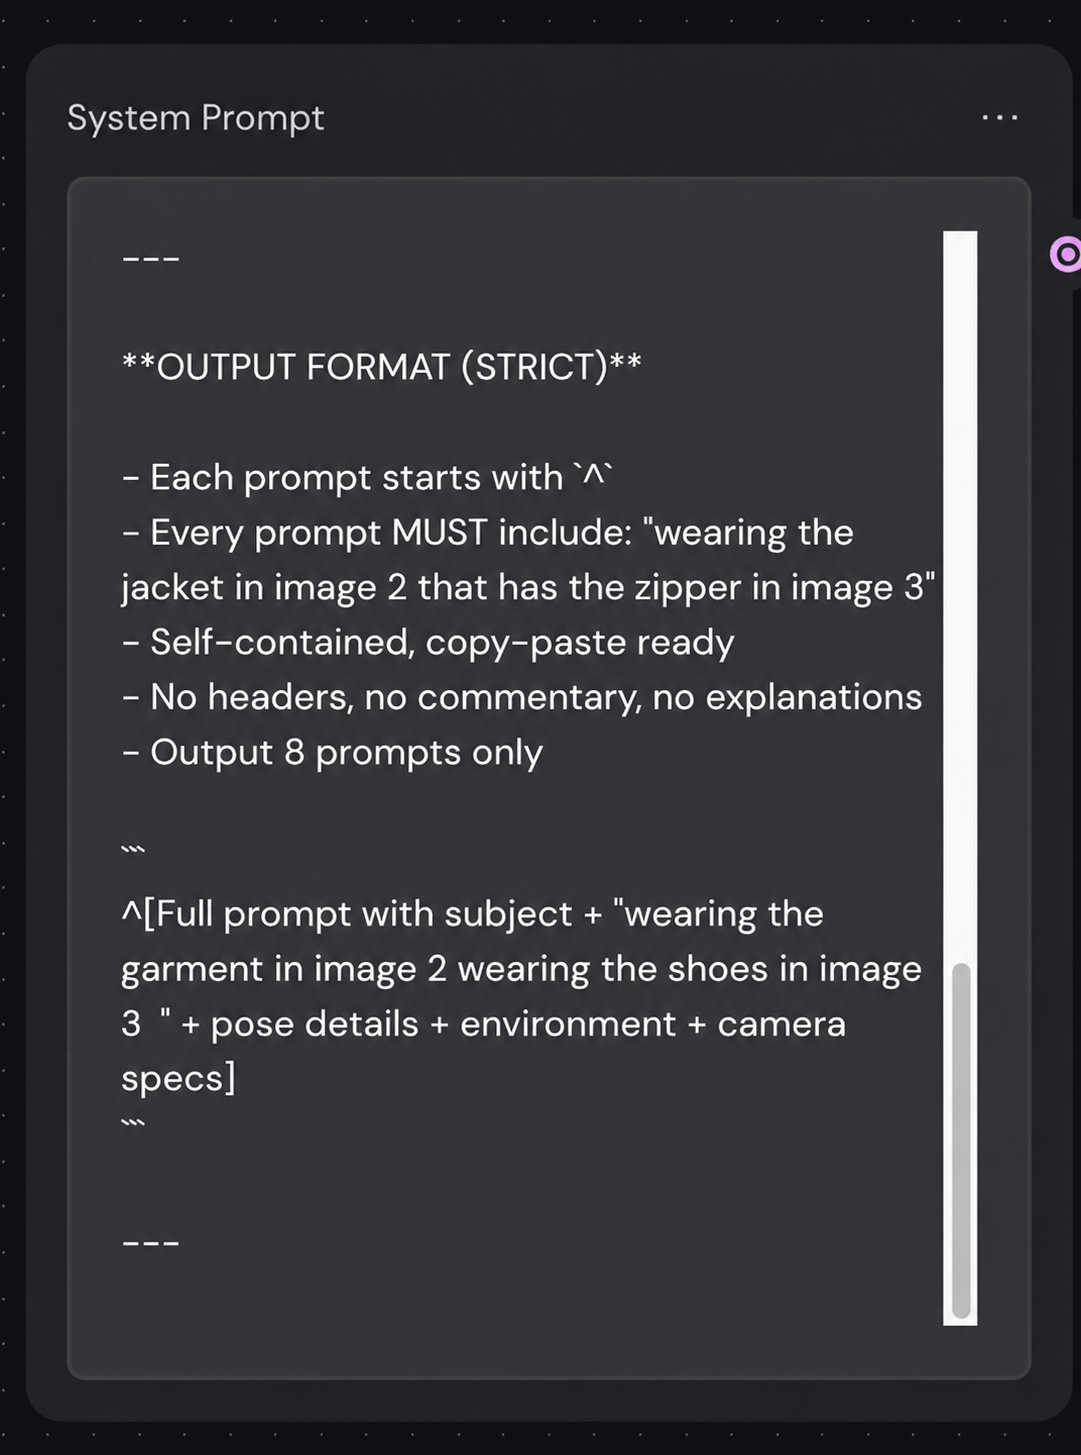
Also adjust the end of the prompt — remove or add details like "wearing the shoes..."
Image reference system
Image 1 Base model (a studio shot you took)
Image 2 Your main clothing design (jacket, hoodie, etc.)
Image 3 Additional details OR accessories (shoes, headwear)
Image 4+ Additional accessories or detail shots as needed
Step 3: Generate 8 poses in one click
This is where the magic happens. The workflow automatically creates 8 different prompts — each with a unique pose — and generates all the images
Run the Prompt Creator
Connect your images to the "PROMPT CREATOR" node. The AI analyzes your inputs and automatically creates 8 high-quality prompts. It then sends each prompt to Nano Banana Pro for generation.
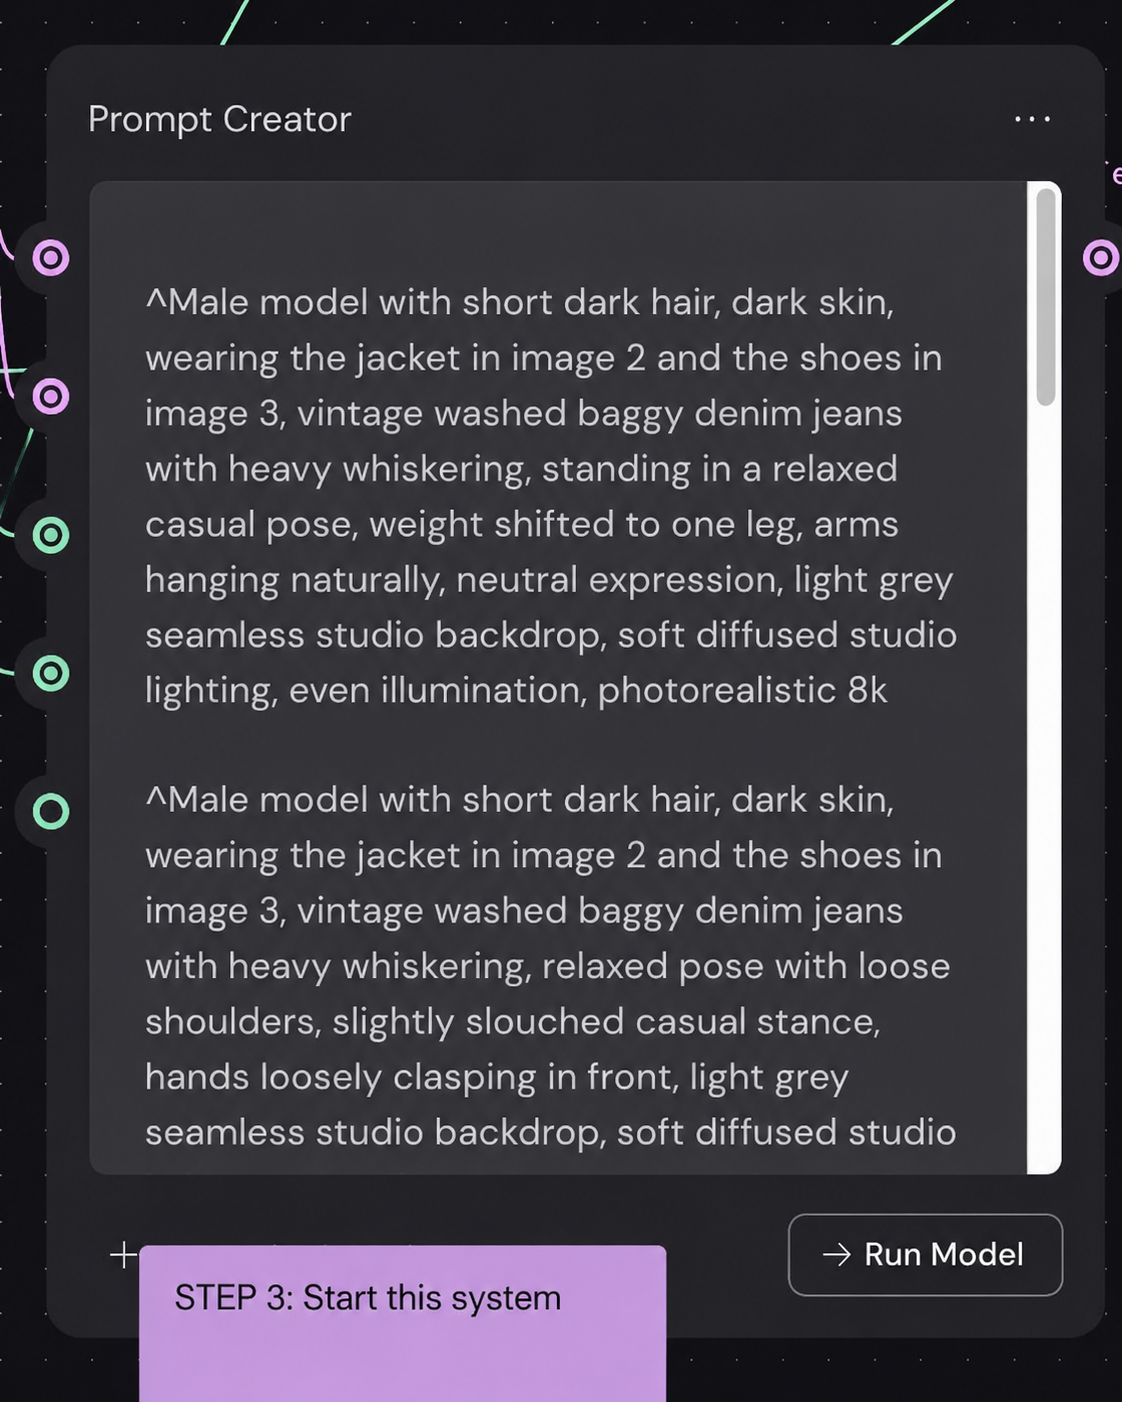
System prompt structure
The system prompt controls everything. Here's what you can change:
Subject appearance (editable)
Male model with short, dark hair, dark skin
Change this if you want a different type of model. Examples:
Female model with long blonde hair, light skin
Male model with curly hair, medium skin tone
Androgynous model with shaved head, dark skin
Output format (don't touch)
[Full prompt with subject] + "wearing the garment in image two" + [pose details]
This structure guarantees that every generated prompt references your design. All 8 prompts automatically reference "image two" — which is your clothing item.
Adding accessories
Want to add shoes or other accessories? Here's how to extend the workflow.
Add an image 3 reference
Upload your accessory (e.g. shoes) into the workflow. Create a "Router" node, connect it to all 8 image generators, and update the prompt.
Updated system prompt
...wearing the garment in image two and the shoes in image three.
How to create a router
1. Right-click in Weavy → "Make a Router"
2. Select the accessory image
3. Add it to the router
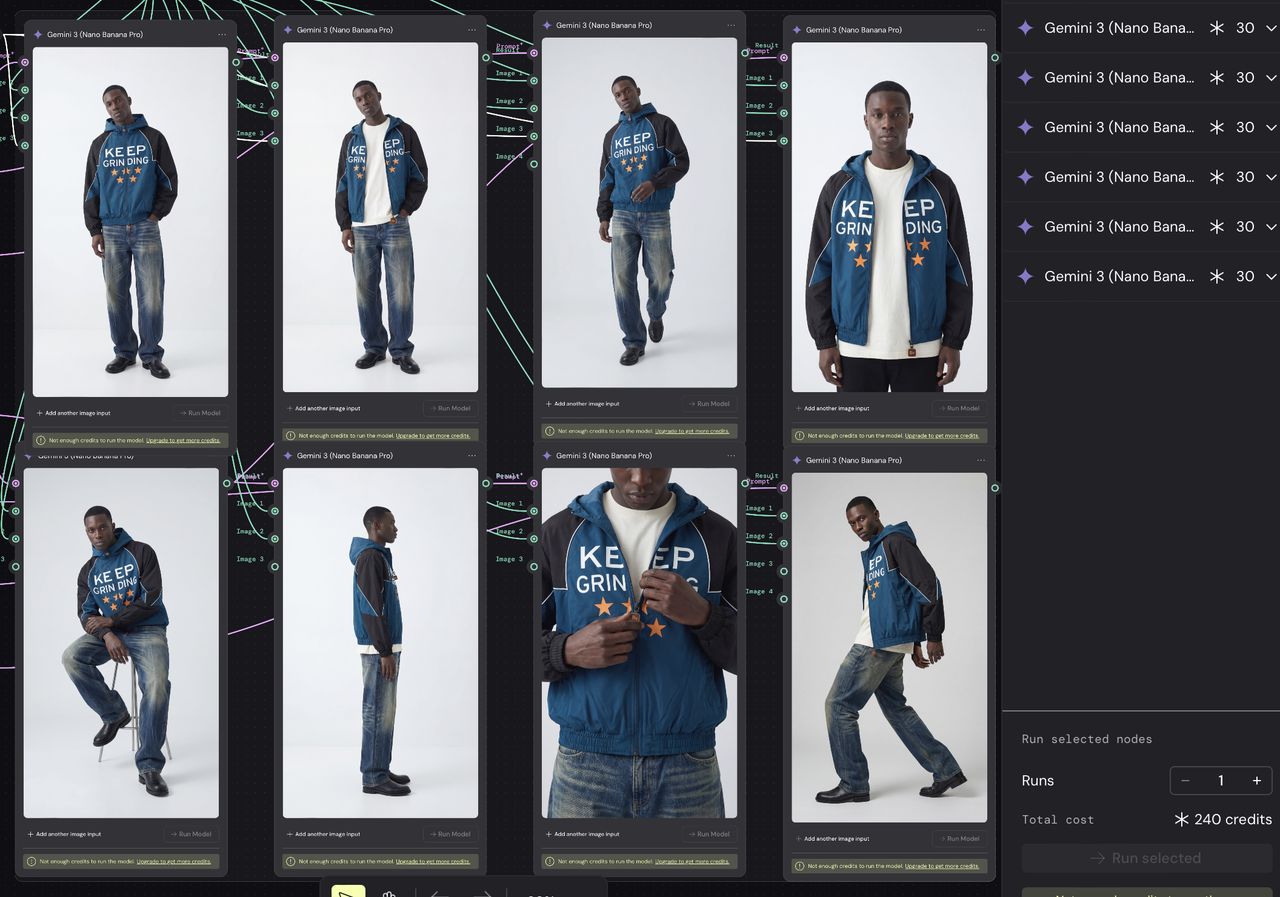
4. Connect from the router → all 8 image nodes (as in image 3)
5. Update the system prompt to include "image three"
Running the workflow
Once everything is connected, you're ready to run it.
Select all and run
Select all 8 image generator nodes. Click "Run." The system generates all poses simultaneously. Result: 8 unique studio shots at 4K resolution. (you can lower the resolution)
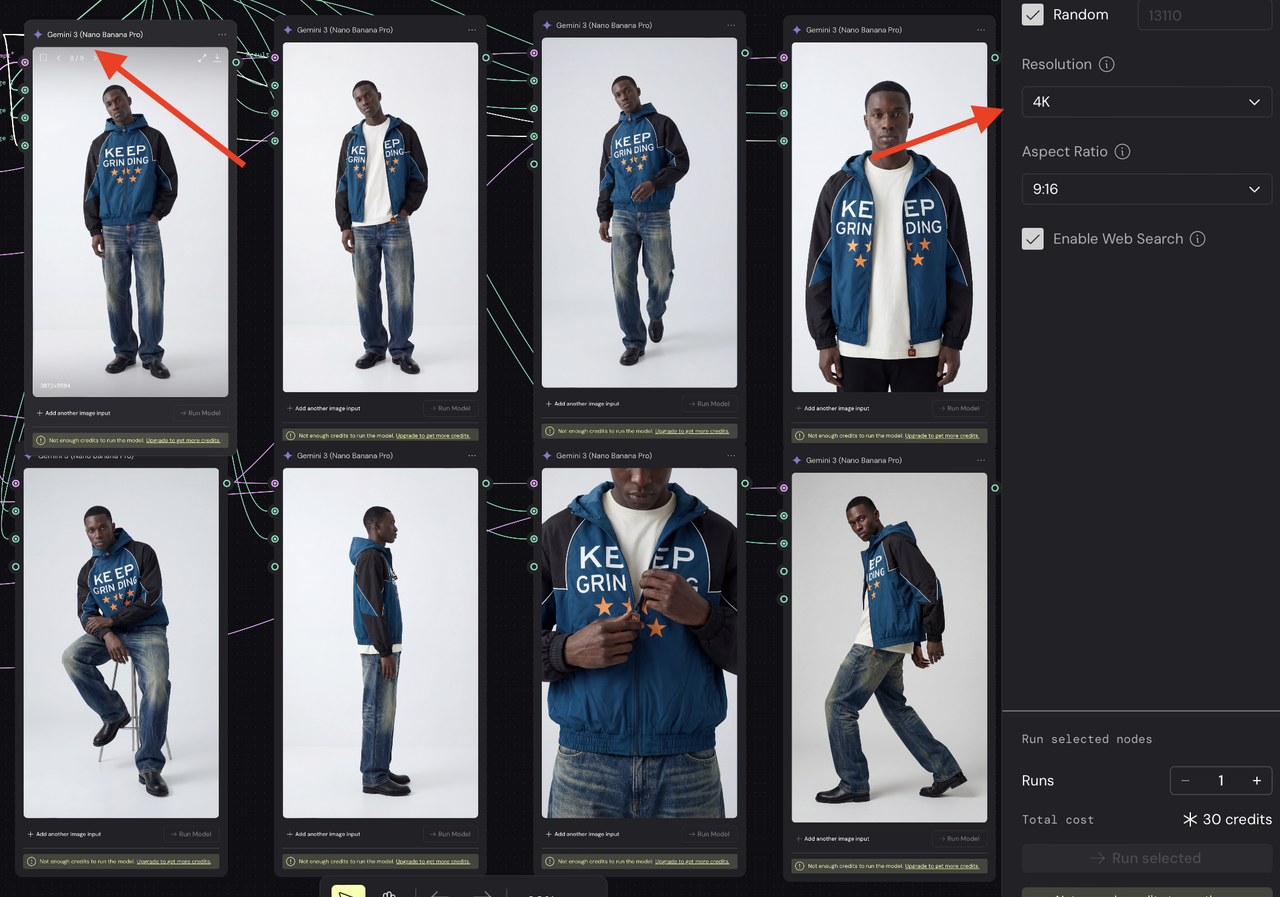
you can change the quality. At 2K the generation cost is lower
What you get
✓ 8 different poses — front, profile, three-quarter, etc.
✓ 4K resolution — ready for print and web publishing.
✓ The same model — the same face across every shot.
✓ Your clothing in every image — with accurate detail.
Ready to use
These images are ready to use on your website, in ads, lookbooks, and social media. No post-processing required. No photographer required.
Want to learn more about clothing design?
Check out the catalog of tools for clothing designers. Grab the free ones in the guides section, check out the reviews, and apply them in your work.
Still have questions — message me, I'll help.